Using the Display Object Toolbox
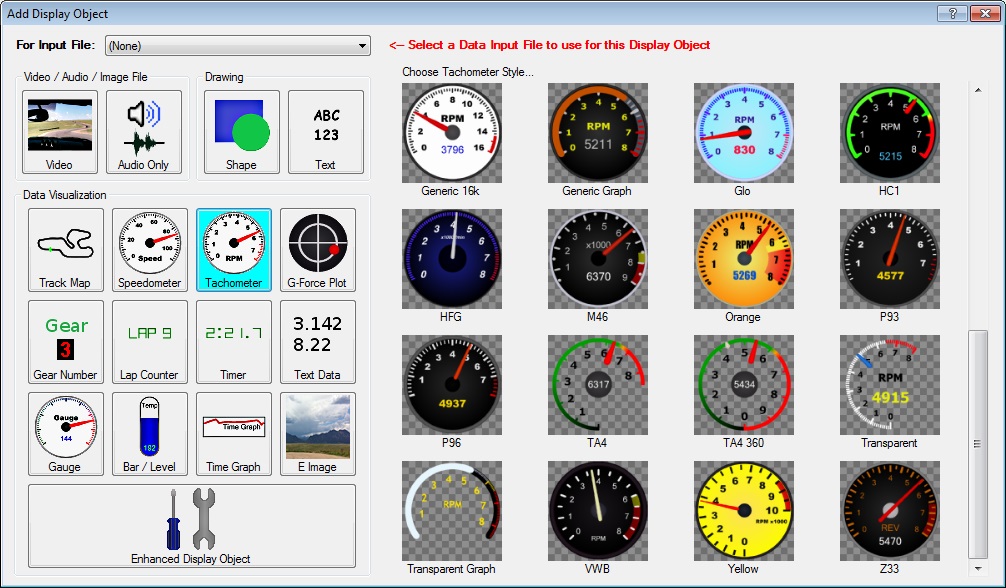
This screen can be reached from the Main screen, by using the Add button under Display Objects, using the icon in the Input Files list, or right-clicking an input file and selecting Create Display Object.
Depending on the selected Input File, certain groups of objects may be grayed-out and disabled. To enable all objects, simply change the input file selection to "(None)".
Objects in the Display Object Toolbox
- Video - Plays the picture and sound from a video input file, or the picture from an image input file.
- Audio Only - Plays only the audio from an audio or video input file, without putting anything visible on the screen
- Shape - Creates a simple colored shape on the screen. This is mostly useful for creating image backgrounds and outlines.
- Text - Adds your own text overlay on the screen.
- Data Visualization Objects - These require a compatible data input file
- Track Map - Track map and the vehicle's current position
- Speedometer - Gauge indicating vehicle speed
See Also: Gauge Designer - Tachometer - Gauge indicating engine speed (RPM)
See Also: Gauge Designer - G-Force Plot - Left/Right and Accel/Decel G-force plot
- Gear Number - Number displaying the current transmission gear indicator. Many more options are available under Enhanced Display Objects
- Lap Counter - Current lap number
- Timer - Running lap time
- Text Data - Displays the number value for the selected data input
- Gauge - Gauge for a selected data input
See Also: Gauge Designer - Bar / Level - Bar or level graph for a selected data input
- 2D Graph - Plots a data input over a selectable time range, distance, or other data field
- E Image - Embedded Image that can optionally be controlled based on a data input
- Enhanced Display Objects - A huge number of different display styles are
possible with this display object type, because it allows advanced users to write script
code to control how it is drawn. That makes it very powerful, but can also be more
difficult to customize than the other display object types.
See Also: Script Editor
Embedded Image Objects
Embedded Image objects allow a still image to be embedded into your project, rather than being dynamically linked to an image file on your computer. They can be displayed normally, flashing, or can optionally be rendered based on a data input file. A selected data field can be mapped to certain parameters for rendering the embedded image, such as: image show/hide, rotation, transparency, brightness, and color hue. This can be used to display indicator icons, rotate a compass image based on the vehicle's heading, and more. The data mapping can also be flipped by simply setting the Min value to the larger number and Max to the lower number.
Embedded images will be stored directly within your project or template files, and are not linked to any image file on your computer. Be aware that this can substantially increase the size of your project and template files. Each 720x480 image can add approximately 1 MB in file size.
There are three ways to add an Embedded Image to your project:
- Create from Toolbox
Creates a blank Embedded Image object, in which you can then load or edit an image from a file.
- Load from a File
Use the File -> "Add Embedded Image to Project..." menu function on the Main Screen to embed an image file into your project.
- Paste from the Clipboard
Copy an image to the clipboard in another program, then use the Edit -> "Paste as Embedded Image" menu function on RaceRender's Main Screen to paste it into your project.
Notes: May only be available for Windows version. Pasted images will lose their transparency channel (if applicable). If you have an image that contains transparency, save it into a transparency-capable file format (such as a Bitmap in 32-BPP [RGBA]) and use the "Load from a File" method instead.