This screen can be reached from the Main screen, by clicking on the Show Timeline button.
This timeline functionality is mostly relating to display objects. If you want to join multiple video or audio clips together in sequential order, please see the Input File Join functionality on the Main screen.
Controls on the Timeline View
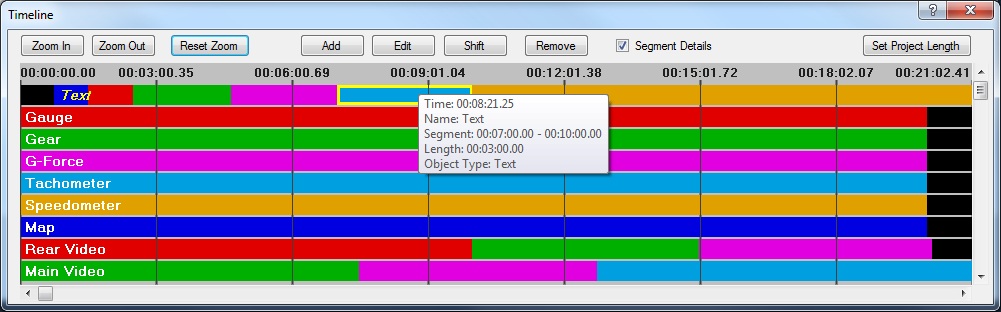
- Colored Bars - Shows the Display Objects and Timeline Segments in the project. The colors are cycled to distinguish each new segment or object. If Segment Details is checked, and the Timeline View window has focus, an information box will follow the mouse pointer to show the main details of each segment. Double-clicking on a segment will open its Display Object Properties box. Right-clicking on a segment will show a menu of options to apply to the segment or object.
- Zoom In / Out - Zooms the timeline in for more precision, or out for a wider view
- Reset Zoom - Sets the zoom level so that the entire project length is displayed in the timeline view.
- Add - Creates a new timeline segment at the project time of your choosing. Changes made at that point will then only apply to the project from that point forward.
- Edit - Opens the Timeline Segment Editor, where you can change the selected segment's starting time and select which parameters are altered by it.
- Shift - Shifts the selected timeline segment, and all following segments, forward or backward by a user-specified amount. The preceding segment, if any, will grow or shrink by the amount of the shift.
- Remove - Removes the selected timeline segment and any changes that had been made during it. This can also be used to remove entire display objects from the project.
- Segment Details - Shows an information box when the mouse pointer is over the timeline bar area.
- Set Project Length - Sets the project to a specific time length of your choosing.